


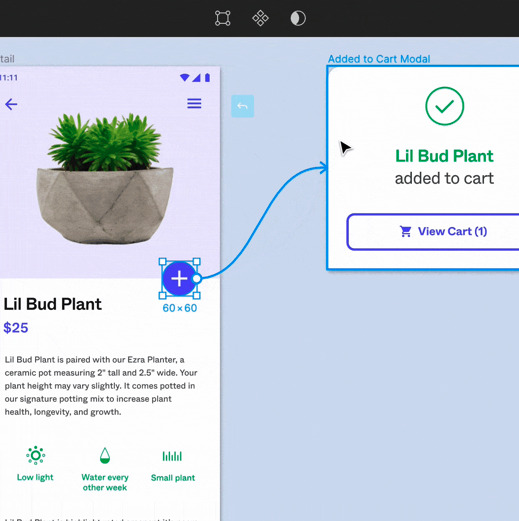
When it comes to creating a prototype of your product, there are many platforms you can use. Figma is a free online UI tool where you can create, collaborate, prototype, and hand off all in the same place. Want to test a prototype you’ve created with Figma? Here’s how!
Start testing in minutes and get results within hours. Tap into our pool of 170k+ testers and watch videos of users interacting with your product on their devices. Discover what’s working for your product, and what’s not!
Start your free trialWhen Is the Proper Timing for Starting to Test My Prototype?
If you want to save money and time, you should start testing your product as early as possible. Testing in the prototyping phase has a lot of benefits: changes on a prototype, for example, are done much faster and often aren’t as complex as on a finished product. That makes prototype testing one of the most efficient and cost-effective ways to improve your product. Creating and improving your prototype and user testing should go hand in hand. Remember that you can test almost everything: interactive click dummies, clickable PDFs, single images of a page, or wireframes.
Generating a Shareable Link in Figma
If you want to test your prototype, you need to generate a link to share with your test participants. To generate a shareable link, open the prototype you’d like to test in Figma.
Switch to the Present Mode by clicking on the ▶ button in the upper right corner.
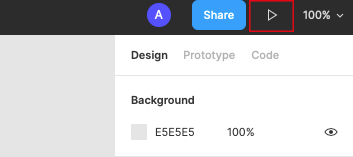
Then click on the button Share Prototype in the upper right corner.
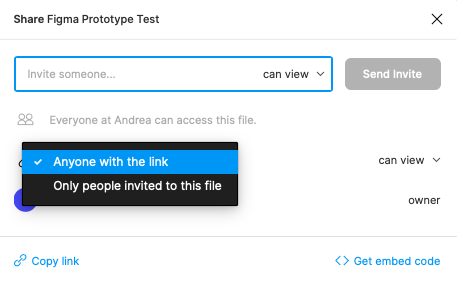
Now select Anyone with the Link and make sure can view is selected.
Close the window and click on Options
Deselect Hotspot Hints on Click and Show Resolved Comments
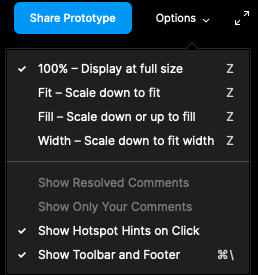
Make sure Show Hotspot Hints on Click, Show Resolved Comments andShow Only Your Comments are deselected.
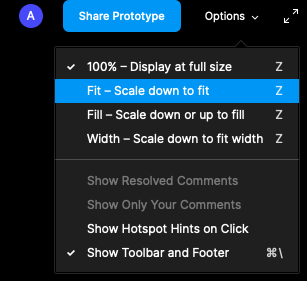
Choosing the Correct Scale Mode
Another important thing when testing your Figma prototype is to choose the correct scale mode. The Scale Mode determines what size your prototype is displayed. The standard setting is 100% – Display at full size – this displays the prototype based on the full size of the frames. This may result in a cropped prototype, depending on the frame and screen size of your participant’s browser. We recommend choosing Fit – Scale down to fit.
Now click again on Share Prototype to copy the prototype’s URL to your clipboard.
How to Test your Figma Prototype with Real Users
The primary purpose of user testing is to find problems to improve your prototype. Having the link copied, you can now start your first user test by either sharing the link with a friend or using a user testing platform. One of the many benefits of using a platform specifically for user testing is that it’s a lot more time-efficient because you don’t have to recruit the participants on your own.
Many people don’t test their solutions because they’re scared of failure. But the truth is, you can’t improve if you don’t know your mistakes. It’s all about discovering them and learning something new. Testing isn’t about if the testers like your product. It’s mainly about if they understand how to use it.
In a user test, you ask somebody to use a product (a website, an app, a can opener, whatever) and think aloud while you watch and listen carefully to what is crossing their mind. You can conduct moderated and unmoderated tests.
The difference between moderated and unmoderated tests is that in the case of moderated tests, you have to be present (on-site, via Skype, etc.) to guide the participants through the tests, whereas with unmoderated tests, you don’t need to be present, because the participants conduct their testing independently and, so to speak, moderate themselves.
Setting up a Test Scenario for Your Prototype Test
No matter which form of user test you want to do, you’ll always need a test scenario. Your testers need concrete and realistic tasks to follow while you’re observing their behavior.
With a Prototype, there are likely things that aren’t working yet. Think about what is already working and what you want to validate. The mindset shouldn’t be “I want to test my prototype” it’s more, for example, “I want to test the navigation”, or “I want to test if the users find the contact button in this current position”.
The selected things you want to test within your prototype will tell you what the tasks should be about.
An example for figuring out if users find the contact section:
You ordered a new laptop on this homepage. After a few days, your laptop broke down, and you want a refund. You now want to get in touch with a responsible authority.
Your tester will then (hopefully) search for contact information, and you can observe if the contact button is in the right place.
An Example of a Test Scenario
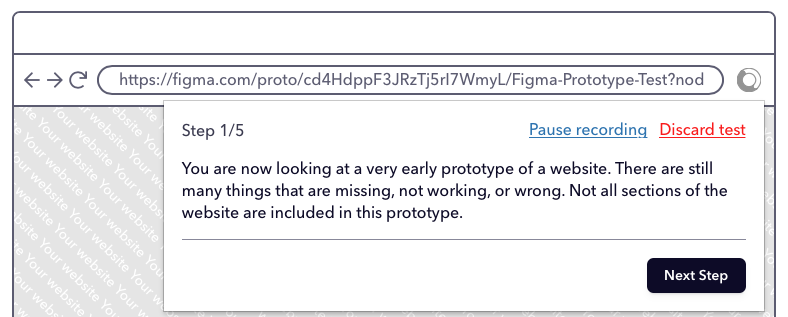
Commonly, a lot of features aren’t working yet in a prototype. Start by explaining to your participants that they’re using an unfinished prototype where some things aren’t working yet. This may sound like this:
You are now looking at a very early prototype of a website. There are still many things that are missing, not working, or wrong. Not all sections of the website are included in this prototype.
A test scenario includes tasks that the tester has to perform. If it so happens, that the tester lands on a page that isn’t working yet, a tip is to ask your participants what they expect from things that aren’t ready yet, so you can find out if your solution would match their expectations. For example, write something like this into your scenario:
Please try to perform the tasks indicated using this prototype. If you land in a section that isn’t ready yet, please explain briefly what you would have expected to find there.
It’s essential to ensure your pages are linked correctly to each other and you don’t link outside the prototype to prevent your testers from getting lost or stuck. In your test scenario, you can deliver a solution as it still may happen.
Should you get “stuck” on a page, you can use this link to find your way back to the homepage [Link to the first page of the prototype]
Questions to Ask in Your Prototype Test
Please describe the individual items on this page. What can you do with them?

What different pieces of information do you see here?

What would you expect to find in the “Gifts” category?

Please describe the individual steps you need to follow to …

What do you think happens when you click on the link “Shipping Options”?

What questions are you asking yourself at this moment?

What do you think could be done with this function?

What is the white icon in the right corner of the screen for?

Can this solution be compared to a product you’ve already used?

Is there something missing on this page?
The less interactivity your prototype offers, the more care you should take when asking questions to your test participants. After all, it will be possible to do only relatively little with your prototype at first – at least if you follow our advice and test your solution as early as possible.
Testing Your Prototype With Userbrain
Userbrain is a remote user testing platform that saves you the hassle of recruiting, managing, and paying for participants to test your website. With Userbrain, you can conduct unmoderated user tests. You get access to a worldwide pool of unbiased user test participants. We’ll now show you a step-by-step guide on how to test your prototype with Userbrain.
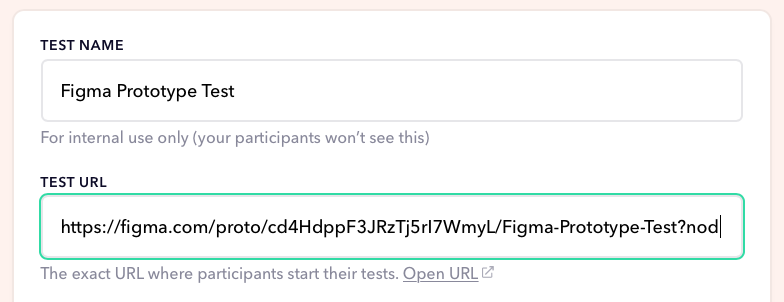
After signing up, start by creating a new test:

Name your test and paste the previously generated link into the Test URL field.
After that, select the language you want to test with and put in your previously written test instructions.
Your testers will see your instructions like this:
Selecting the Participants for Your Prototype Test
As Userbrain offers you a pool of testers, it’s now time to choose the participants you want to test with. You can choose between different options:
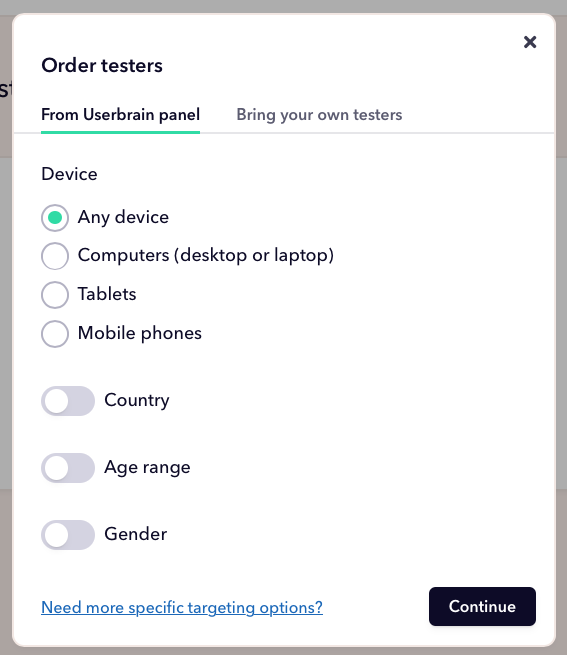
You can either choose “Any device”, with which you’ll receive results very soon, or you can choose from different demographics of your testers.
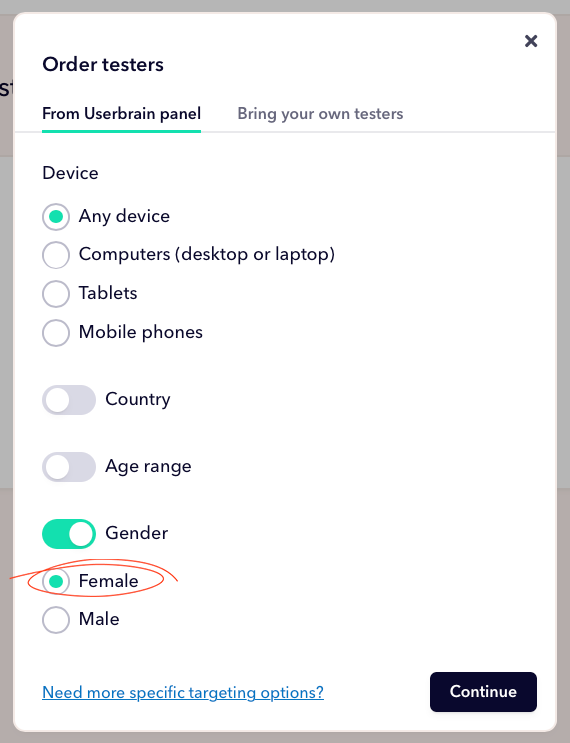
Demographic Targeting
If your product has a specific target group, you may only want to test with people who fit into this group. For such cases, you can target them with different demographics. For example, if you’re testing a prototype of a website for women’s clothes, you may want your testers only to be female. Demographic targeting in moderation is helpful, but try not to get obsessive with demographics.Generally speaking, testing a prototype where the main focus is on testing specific functionalities, demographic targeting isn’t that important.
In Userbrain, this would look like this:
After selecting your participants, let’s head on to ordering the videos.
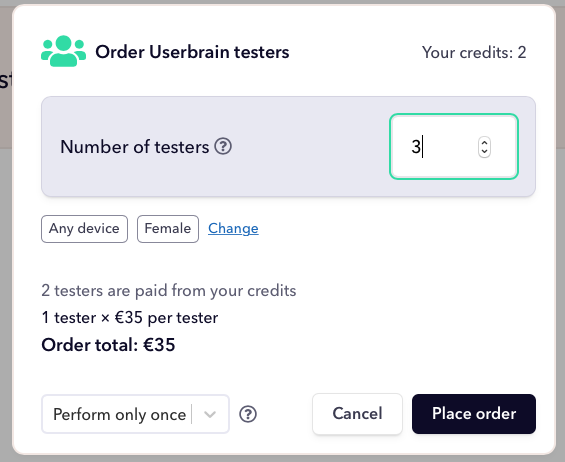
How Many Participants Do I Need?
Steve Krug, the author of the usability bestseller “Don’t make me think!” recommends testing with three test participants per round.
Here’s why:
- Finding three test participants is less work than searching for more
- Doing more than three tests on a single day means getting snacks for the people who moderate the tests and also for those who watch the tests
- If you test with three test participants, you can do your tests and present the results on the same day
Keeping in mind that he recommends this amount of testers per round. Per round means that we test more than just once.
We’re going to select 3 participants, and we want to test our prototype on a desktop device. By clicking on Specify device type, you can select the device you want to test on. In this case, we will choose only desktop devices. Alternatively, you can also choose mobile or tablet or get mixed devices. By clicking on Order 3 test videos, you submit your order.
After some time, you’ll receive your first test result.
Evaluating the Tests
The goal of user testing is to improve your product. To improve your product, you need to find problems to solve. And assessing a user test is nothing else than embarking on the search for problems. After finding a problem, try to understand the reason for the problem. After that, you can head on to solving the problem.
Pick the three biggest problems
After your first user test, you might be left with 20 problems that need to be fixed. As this can be overwhelming initially, a tip is to focus on the three biggest problems and prioritize the usability issues.Try to fix them and then do another round of testing to see if your solution solved the problems and pick the following three most important things that need to get fixed.
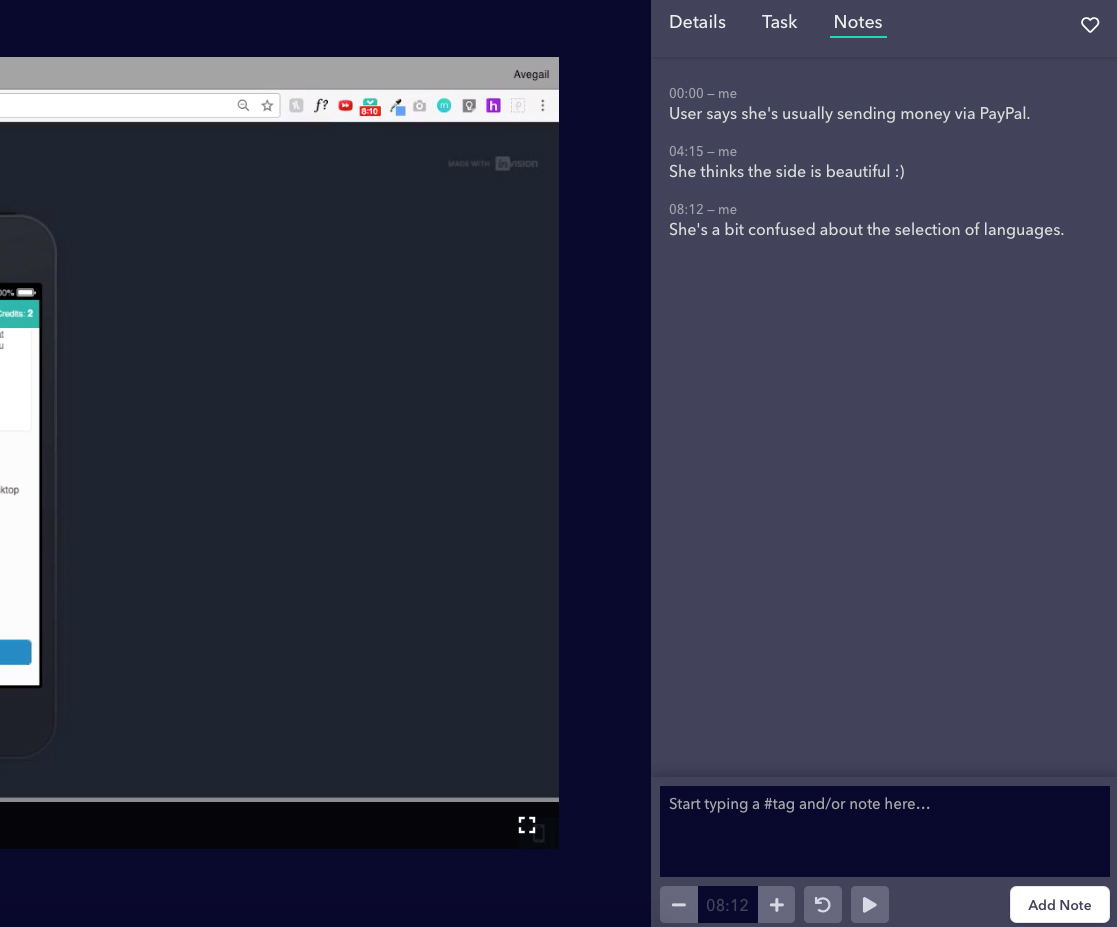
With Userbrain, you can take notes when a problem occurs during the test.
What to Do After Completing Your First Test
Congratulations, you now conducted your first prototype test! And now? The only real wrong thing you can do is to stop testing. You may have solved some problems with the product, but that doesn’t mean you’ve finished improving it.
Proactive Usability Testing
Proactive usability testing is about constantly testing (and improving) whatever you’re working on, while you’re working on it, whether you’re a website owner, designer, or developer. Since you’re typically still at the beginning of a project when you start testing proactively, you are not resistant to newly identified problems, but look forward to negative usability feedback, to improve your current solution.
The RITE Method
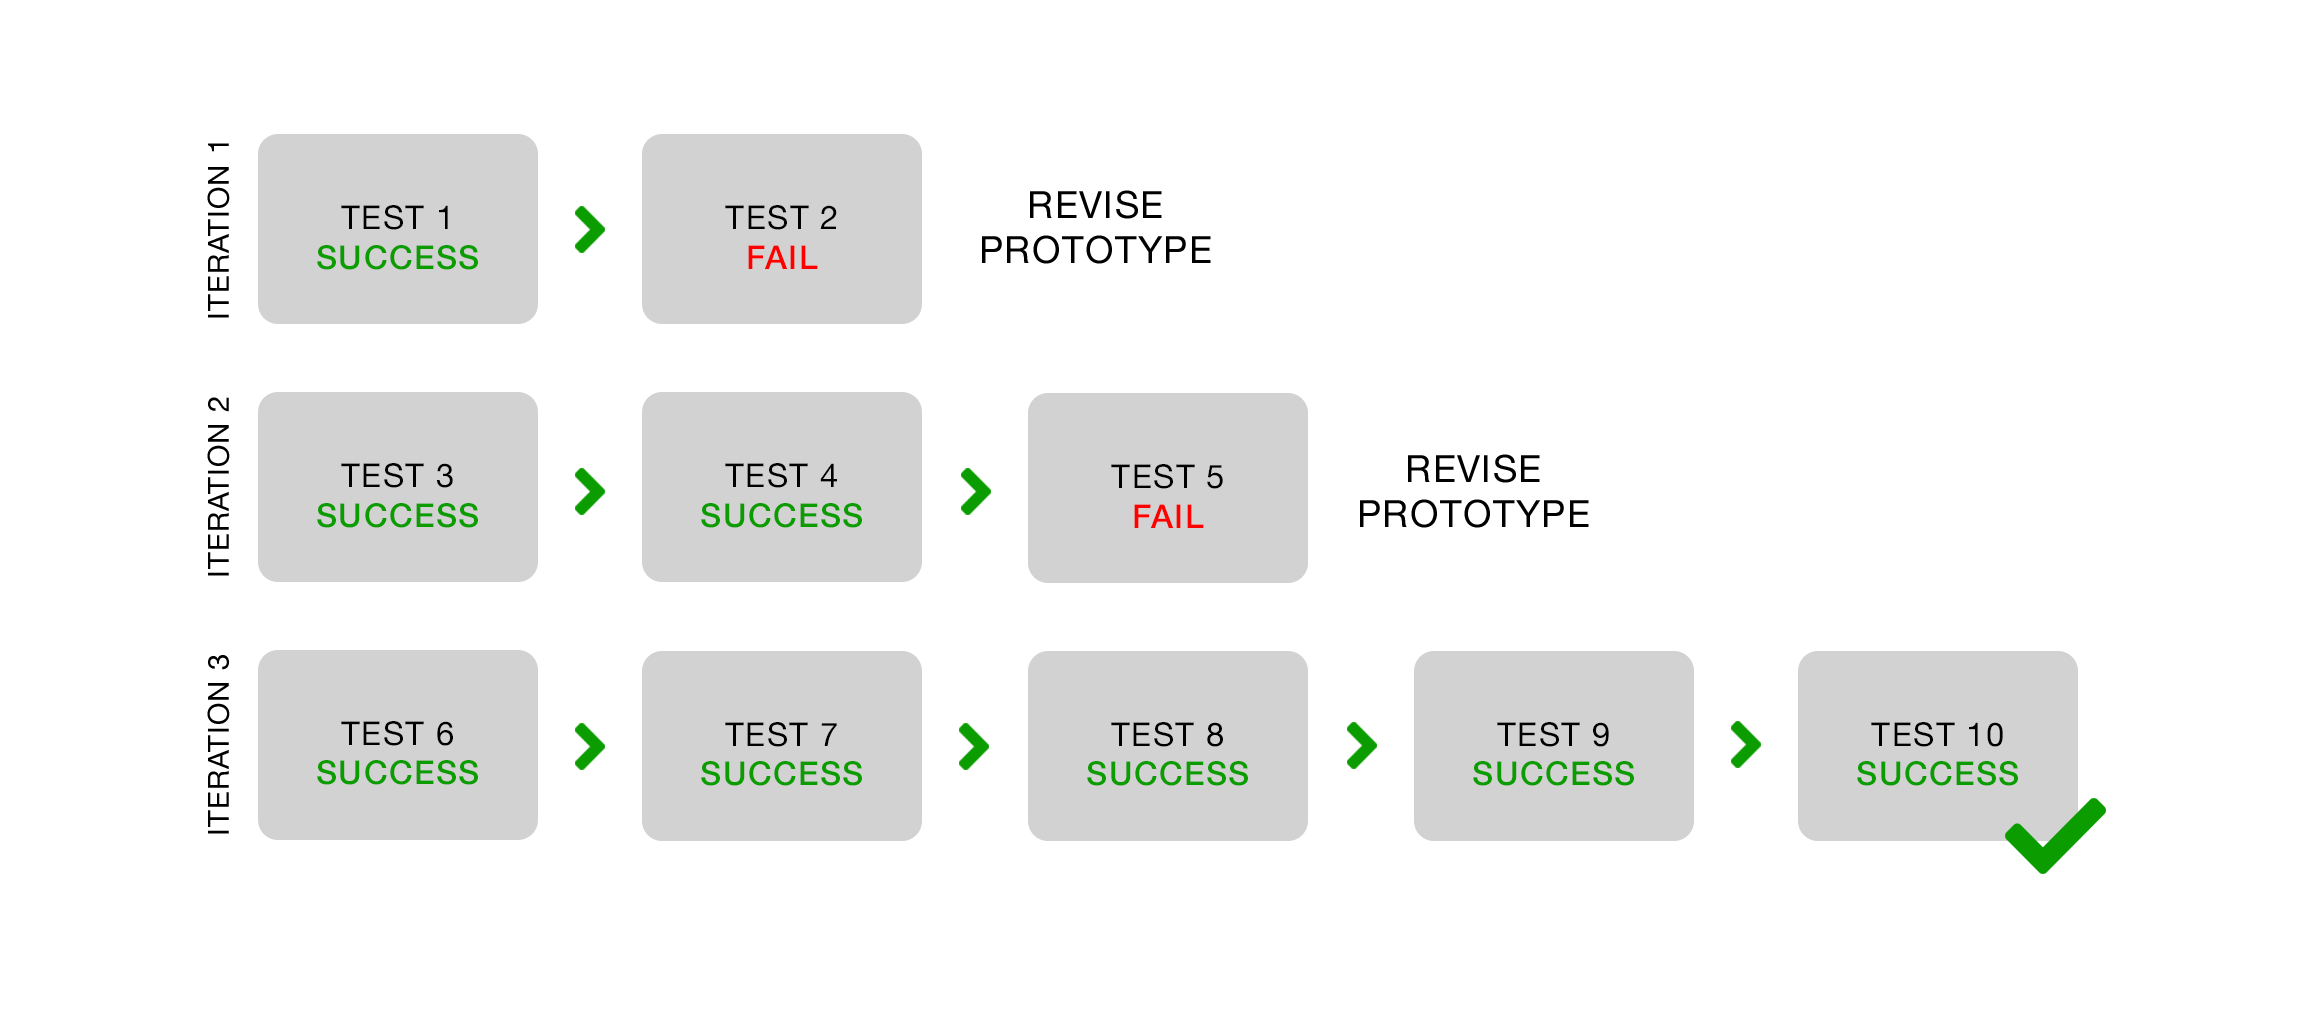
RITE stands for Rapid Iterative Testing and Evaluation. The main idea behind it is to offer a fast, powerful, and low-risk way of enhancing your designs. When using the RITE method, you’re testing a version of a prototype as you would typically do. But instead of waiting until the end of the study to gather the findings, changes are made as soon as issues are discovered by one or two participants. After changes are made, you continue testing and stop again if a problem occurs. This method is perfect for testing a prototype because you can quickly test and get feedback on new solutions.
Make Usability Testing a Habit
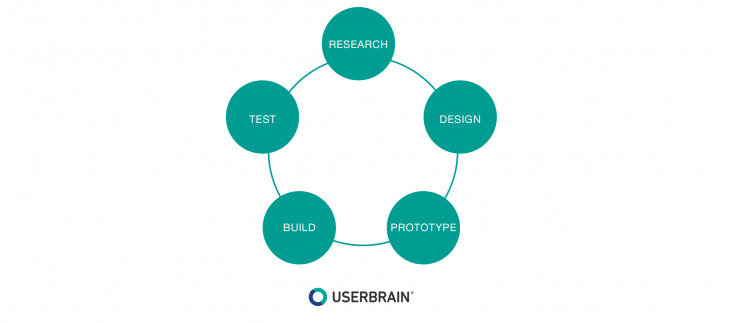
It often happens that after solving one problem, another one occurs. User Testing should be part of your workflow, and you should definitely make it a habit!Ideally, your workflow should look something like this:
Summing up
Let’s review! Here are six steps to test your Figma prototype with Userbrain:
- Generate a shareable link on Figma
- Create your task scenario
- Run your own moderated test or use a remote user testing platform
- Run a trial test with 1 participant and test with 3-6 participants per round
- Focus on the 3 biggest problems
- Follow the RITE method and test again
Ready to test your prototype? Sign up for Userbrain’s trial and get two testers for your first user test for free!